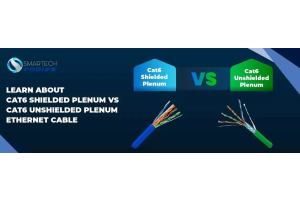
The UTP stands for unshielded twisted pair. A UTP patch cable is a type of length cable that is accompanied by already installed connectors on both ends. Remember, UTP cables are the most commonly used ethernet cables not just in the USA, but across the globe. So, if you are bombing the internet with phrases like what is patch cable, stop doing it, as in this article, you will learn not only about the patch cable but also the process of making it.
Ethernet Patch Cable:
Unshielded Twisted Pair is often closely associated with Ethernet Standards that is the same often used as Ethernet Cable. However, this is not the actual case. Out of multiple cables out there, a UTP is one of the cable types used in networking. Other types of cables are multimode fiber optic cables, single-mode fiber optic cables, and twin axial cables.
UTP – Unshielded Twisted Pair:
As stated earlier, UTP cables are most commonly used cables in networking as they are way cheaper than their shielded counterparts. The reason, again, is the simple one: these cables do not have an extra layer or layers or protection embedded beneath the plastic jacket of the cable. To provide protection against the electromagnetic interference, in a UTP cable, wires are twisted together.
Unshielded twisted pairs are ideal for spaces where crosstalk and electromagnetic interference are not in excess. On the other hand, shielded twisted pair cables are ideal for spaces where there is an excess of crosstalk and electromagnetic interference. As crosstalk and EMI compromise signal quality, it will take a toll on your overall network performance. However, if there is no or little presence of crosstalk and EMI, it is better to install unshielded twisted pair cables as they are way cheaper. Also, why spend extra bucks when UTP cable can do the same job perfectly (in an environment where crosstalk and EMI are minimum).
How to Make an Ethernet Patch Cable?
You will begin by cutting the cable (either Cat5e or Cat6) to the length required. You have to make sure that the boots are facing towards the connector. Now, with meticulous attention, strip the jacket of your Cat5e Cat6 cable back by 1 inch approximately. You can do this either by cutter or by hand. Now you will move on to the next step and untwist all of the 4 pairs. Then, straighten each of the 8 wires as possible. For a standard patch cord, you will use a 568-B wiring scheme on either end. Now move to the third phase, i-e, bringing all eight wires closely together as much as possible.
You will hold the sorted and grouped wires tightly together between the forefinger and the thumb. Now you will cut all eight wires at an angle of 90 degrees. For this purpose, you will use a sharp cutting tool. Here comes the most important phase. Insert all eight wires into the connector with meticulous care while ensuring that connector pins are facing up. To properly seat the wires in the connector, use moderate amounts of force. Carefully observe the tip of your RJ45 connector to ensure that all eight wires are correctly inserted in the connectors. Keep enough cable jacket inside the connector so that wires remain safe from any damage. Now you will place the connector into a crimp tool and then squeeze hard. Repeat the same process on the other end.
Voila! You are all good to go. Hopefully, your query “what is patch cable” has been answered and you are able to make patch cables all by yourself.
How to test ethernet patch cables?
Once you have successfully made your own ethernet patch cable, it is important to test it. This will make sure that the patch cord you have just made is working perfectly.
There are many ways in which you can test your patch cable.
For example, one way is by using a cable tester, which will check for continuity and proper wiring. Simply plug the patch cable into a cable tester and it will tell you whether it is working or not. A cable tester will also tell you if a single wire is not connected properly. This way of testing patch cables is particularly useful when you have no idea what might be wrong with a perfectly terminated cable.
Another way to test your cable is to connect it to a device on both ends and run a network test using a network scanner or the ping command. This will check for connectivity and help you identify any issues with your cable.
To use the ping command, go open the CMD prompt on your device that is connected to the network you are testing. And simply type “ping” and hit enter. This will display all the info related to the latency or the ping on your network.
To ensure that your cable is functioning at its best, it’s important to test it regularly.
By following these simple steps, you can ensure that your Ethernet patch cable is working properly and keep your network running smoothly.
Smartech Cables
Are you looking for innovative ethernet cables or accessories? Check out Smartech Cables. We are the industry leader in manufacturing and distributing networking cables and accessories of the highest standards. Our products exceed the industry limits and our prices are market competitive. If you need help, our professional customer support team is available at sales@smartechcables.com.


