Top Tips For Network Cable Management: Step Towards Optimal Performance Part 2
Top Tips For Network Cable Management: Step Towards Optimal Performance Part 2

Here is the next part of cable management that will idealize the best hierarchy of the cabling that runs through the data center or IT room to each department. What are the tips (Steps) for managing the cables? There is no other way to manage the messy ethernet cables and for that reason, there are some steps to follow for a bright network cable management system.
Steps For Good Cable Management
These steps are advised to be imitated for your cabling management solution and there will be no copyright claim. For your neat cabling solutions you should obey these steps for managing your cables for a professional look and to catch the problem for troubleshooting.
Step 1 — Choose the Location for Network, Fiber, and Power Cables
There are two possible locations for installing cables whether horizontal or vertical. For horizontal cables mostly fire resistive jackets are used. The plenum jackets are feasible for airy spaces and can protect the cable's internal structure and avoid fire propagation.
The vertical space within the building is only for riser cables; they are specially designed for inside wall installation and data centers to protect the cable harmony.
Step 2 — Installing Plan
Installation plan is the foremost part while you are going to install the cables in specific designations. For the installation plan make sure to cut the cables with some extra lengths. Gather tools that are necessary for the installation. Like RJ45, Keystone Jacks, Wall plates, and other necessary tools for fiber optic cables.
Step 3 — Prepare the Installation Kits
It's hard to install the cables bare-handed so you need proper tools and kits to begin the installation. You can either buy these tool kits from your nearby store or from online.
Step 4 — Begin Installation
This step involves carefully installing the cables. There should be maximum tensile strength for the network and fiber optic cables. Avoid any kinks while installing the cable to the conduit or network closets to avoid speed attenuation.
Step 5 — Labeling is Important
The most important thing is to label the cable for their specific connection types from patch panels, server racks, or different departments. Like, as labeling the fiber connection types, cables for surveillance, etc.
Step 6 — Organize and Clear Pathways
All the network cables or power cables should be installed in a clean pathway. Do not bend cables over their recommended bending radius. Observe the length of cables, and use appropriate wiring schemes like T568A or T568B for the whole cabling structure so that it is quite easy to identify the terminating cables for other projects. Use conduit spaces if needed.
By following these steps you can secure a healthy networking setup. The messy cables look quite unprofessional and can cause major issues to the cabling infrastructure. So cable management is important. There is another debate about patch panel cable management techniques. So what is that?
Guaranteed Best Price !
Patch Panel Cable Management Technique
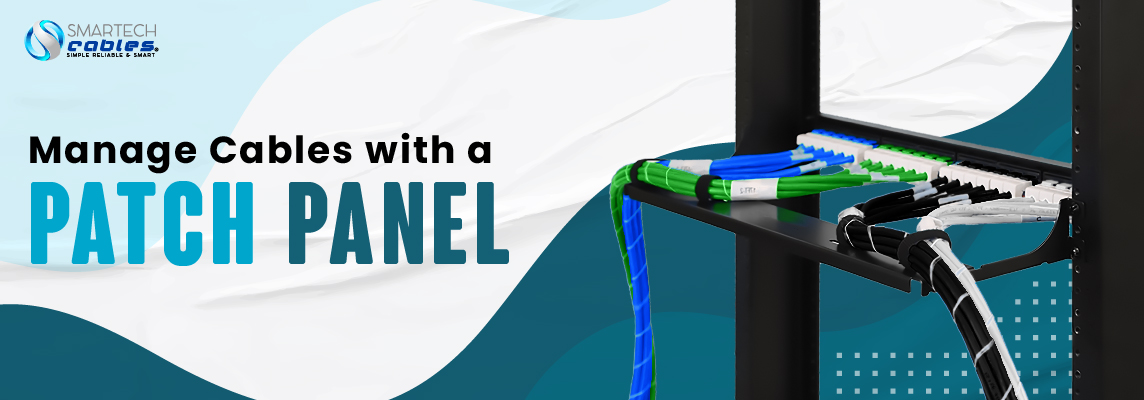
Patch Panel is a main tool to attain a well-organized network cabling structure. It is often used for server racks in data centers to maintain the vertical or horizontal installation. The patch panel is designed with 12, 48, and 96 ports to cover the huge amount of networking cables within the server rack. It lowers the burden of managing bulk cables.
What is Patch Panel Cable Management?
Just imagine a tangled mess of network cables that have no sign or trail for different connections. This is where the patch panel cable management technique comes into play.
- Choose loaded or unloaded patch panels for your ease and evaluate what type of termination you need. If you use loaded patch panels you are likely to just terminate the patch panel using the wiring scheme (T568A or T568B).
- Once you decide on the connection types, label them for your identification or use for the other installers.
- Install patch cords for shorter-length installation connections. This will give you the ease to terminate the connection for troubleshooting.
- Use vertical and horizontal patch panels for aligning the cables into your rack and to make them look vivid and queued.
Well, that is just not the limit. There are some benefits to the patch panel cable management technique and it pours out the following benefits.
- Improved Clarity
- Simplified and Effortless Maintenance
- Better Airflow
- Scalability
- Clean Cabling Environment
Steps to Manage Cables with a Patch Panel
Just like network cable management steps, there are some steps involved that thoroughly explain the connection of patch panels and cable assembly. Following are the steps to follow for proper network cable management.
- Kit up with tools — grab all the necessary tools like patch panels, punch-down tools, keystone jacks, and the right length of network cables.
- Layout Planning — Count the connection types and make a viable diagram for your project and desired cable routing.
- Cable Termination — use keystone jacks to connect with patch panels and install network cables by terminating with an RJ45 connector. Make sure to note down the wiring scheme.
- Labeling Everything (Cables) — Label everything on each cable about the connection type. It will ease in finding faulty connections.
- Patch the Connections — use cable ties or velcro straps to tie the cable firmly and you can also use a patch cable to connect its corresponding port on the patch panel.
- Maintain Documentation — It will act as a user guide if there is another cable installer for maintaining the cable connection to understand the cabling connection types.
Final Thoughts
Network Cable Management System is a necessary practice for every IT or large enterprise to deal with the right type of connectivity. All our business and operations depend on the internet connection and stability. Well, that is achievable but if the data centers are not well-maintained. You are going to experience a breakdown in Internet connectivity or the untangled messy cables are tripped over and the internal conductor might get damaged.
If that is the case, expect some serious consequences for troubleshooting the cable. All the above information is not for reading but to implement and improve your cable management. So, it's 100% sure that the network cable management does matter.


