
Millions of Americans have struggled with slow WiFi and dropped connections during essential video calls and gaming sessions for over a decade. We've all been there: buffering videos, laggy online meetings, and frustrated family members competing for bandwidth. That's why savvy homeowners turn to hardwired Ethernet connections, the gold standard for reliable internet performance.
Installing an Ethernet cable to the wall may seem complex, but it's a straightforward DIY project that can significantly enhance your home network. With the right Ethernet wall socket and proper Cat 6 wiring diagrams, you can permanently achieve gigabit speeds and eliminate wireless dead zones. Following TIA/EIA-568 industry standards ensures your installation meets professional requirements and delivers maximum performance.
Whether setting up a home office, upgrading your gaming setup, or simply wanting rock-solid internet throughout your house, this guide covers everything you need. We'll guide you through selecting the right Ethernet wall socket wiring diagram, choosing the proper tools, and completing a professional-grade installation that would make any network technician proud.
Ready to say goodbye to WiFi frustration? Let's build the reliable network your home deserves.
The Basics of an Ethernet Wall Socket
An Ethernet wall socket (also called an Ethernet port in the wall) is essentially the on-ramp to your internet highway. Think of it as a permanent bridge between your device and your network infrastructure. Unlike temporary solutions, these wall-mounted connection points provide professional-grade reliability that adapts to your growing connectivity needs.
The magic happens through standardized components that work together seamlessly. Your Ethernet wall socket Cat6 installation uses keystone jacks – modular connectors that snap into wall plates, much like digital Lego blocks. These aren't just fancy plugs but precision-engineered components that maintain signal integrity across your entire network.
Decoding Ethernet Cable Categories
|
Cable Type |
Maximum Speed |
Bandwidth |
Best Use Case |
|
Cat 5e |
1 Gbps |
100 MHz |
Basic home networking |
|
Cat 6 |
1 Gbps (10 Gbps short runs) |
250 MHz |
Modern home/office networks |
|
Cat 6a |
10 Gbps |
500 MHz |
Future-proof installations |
Cat 6 cables dominate today's installations because they strike a balance between performance and cost-effectiveness. They handle gigabit speeds effortlessly, providing ample headroom for future upgrades. Additionally, the TIA/EIA-568 standards ensure that your installation will be compatible with equipment from any manufacturer.
Essential Tools and Materials for Success
Your Installation Toolkit
Getting the right tools upfront saves hours of frustration later. Professional installers swear by quality equipment, and for good reason – cheap tools create expensive problems.
Must-Have Tools:
- Wire strippers with gauge markings
- Punch-down tool (110-style for keystone jacks)
- Cable tester or network analyzer
- Electric drill with various bits
- Fish tape or wire-pulling system
Quality Materials List:
- Bulk Cat 6 Ethernet cable
- Cat 6-rated RJ45 keystone jacks
- Single or multi-port wall plates
- Low-voltage mounting brackets
- Cable management accessories
Here's a pro tip from network technicians: invest in a quality punch-down tool. The $15 version will frustrate you endlessly, while a $40 professional tool makes connections effortless and reliable.
Ethernet Wall Socket Wiring Diagram Guide
T568A vs T568B: The Great Wiring Standards Debate
The T568A and T568B wiring standards are both practical, but consistent application is crucial for their effective use. T568B is commonly used in residential settings as it aligns with the earlier AT&T 258A standard, which many technicians initially learned.
|
Wire Position |
T568A Color |
T568B Color |
|
Pin 1 |
White/Green |
White/Orange |
|
Pin 2 |
Green |
Orange |
|
Pin 3 |
White/Orange |
White/Green |
|
Pin 4 |
Blue |
Blue |
|
Pin 5 |
White/Blue |
White/Blue |
|
Pin 6 |
Orange |
Green |
|
Pin 7 |
White/Brown |
White/Brown |
|
Pin 8 |
Brown |
Brown |
Reading Your RJ45 Wall Socket Wiring Diagram
Every quality Cat6 keystone jacks includes a wiring diagram showing exactly where each colored wire connects. These diagrams follow international standards, so you can handle any brand once you learn to read one of them.
The secret sauce? Most keystone jacks are color-coded. Simply match the wire colors to the corresponding slots on the jack. The punch-down tool does the heavy lifting, cutting excess wire and ensuring solid connections simultaneously.
Step-by-Step Installation Process
Planning Your Ethernet Wall Socket Installation
Avoid costly errors by planning your cable runs and wall socket placements. Consider both your current and future needs for a setup that will serve you well over time.
Location Selection Checklist:
- Avoid electrical interference sources
- Ensure adequate clearance for furniture
- Plan for cable management behind walls
- Check local building codes for requirements
Cable Route Planning:
- Measure twice, cut once applies here
- Account for the extra length at both ends
- Plan for proper bend radius (Cat 6 minimum 1-inch)
- Consider conduit protection in commercial installations
Running Your Network Cable Like a Pro
This step separates amateur installations from professional-grade work. Proper cable handling preserves signal integrity and prevents future signal integrity issues.
Start by drilling your wall penetration holes carefully. Use a paddle bit for clean entry points, and always check for electrical wires or plumbing behind walls. A basic wire detector costs $20 and prevents thousands of dollars in repair bills.
Fish your Ethernet cable, such as a Cat6 Plenum Cable, through the wall cavity, leaving 8-12 inches of working length at the wall socket location. This extra length provides flexibility during termination and allows for future modifications.
Connecting Your RJ45 Wall Socket
Time for the satisfying connections! Begin by stripping approximately two inches of the outer jacket from your wide range of Ethernet cables. This will expose the eight individual wires located inside.
Professional Termination Steps:
- Untwist wire pairs only as much as necessary
- Arrange wires according to your chosen standard (T568A or T568B)
- Insert wires into the keystone jack slots firmly
- Use the punch-down tool to secure and trim wires
- Test connections before final installation
The punch-down tool requires firm, steady pressure. You'll hear a subtle "click" when the connection is seated correctly. Don't be afraid to apply pressure – these connections need to be mechanically and electrically solid.
Testing Your Installation
Professional installers never skip testing – and neither should you. A basic cable tester confirms continuity and proper pin assignments. More advanced testers measure signal quality and identify potential performance issues.
|
Test Type |
Equipment Needed |
What It Checks |
|
Continuity |
Basic cable tester |
Wire connections |
|
Certification |
Network analyzer |
Performance compliance |
|
Speed Test |
Computer/device |
Actual throughput |
Troubleshooting Your Ethernet Connection
Common Installation Challenges
Even the most meticulous planning can sometimes encounter unexpected obstacles. Here's how network professionals handle the most frequent issues.
No Network Connectivity:
- Verify cable continuity with a tester
- Check wiring standard consistency
- Confirm that punch-down connections are solid
- Test with a known-good patch cable
Slow or Intermittent Connection:
- Look for kinked or damaged cables
- Check for electrical interference sources
- Verify the cable category matches the network speed
- Test individual wire pairs separately
Physical Connection Problems:
- Ensure the keystone jack is fully seated
- Check the single-port standard faceplate mounting stability
- Verify patch cable compatibility
- Clean connectors if necessary
Conclusion:
When troubleshooting network issues, always begin with the simplest potential causes. Complex problems often stem from basic oversights, such as loose connections, incorrect cables, or configuration mistakes.
Remember that even experienced installers began by learning the fundamentals. By being patient, using the correct tools, and paying close attention to detail, you can achieve professional-quality Ethernet wall socket installations. The crucial steps are to take your time, adhere to established IEEE 802.3 Ethernet technology standards, and always test your work.
A dependable wired network connection is within reach. You'll appreciate the stable performance of correctly installed Ethernet wall sockets and likely regret not upgrading sooner.
FAQs:
What is an Ethernet wall socket?
An Ethernet wall socket (or port) is a fixed network connection point, typically embedded in a wall, that allows devices to connect to a wired local area network (LAN) using an Ethernet cable. It provides a stable and often faster alternative to Wi-Fi for network access.
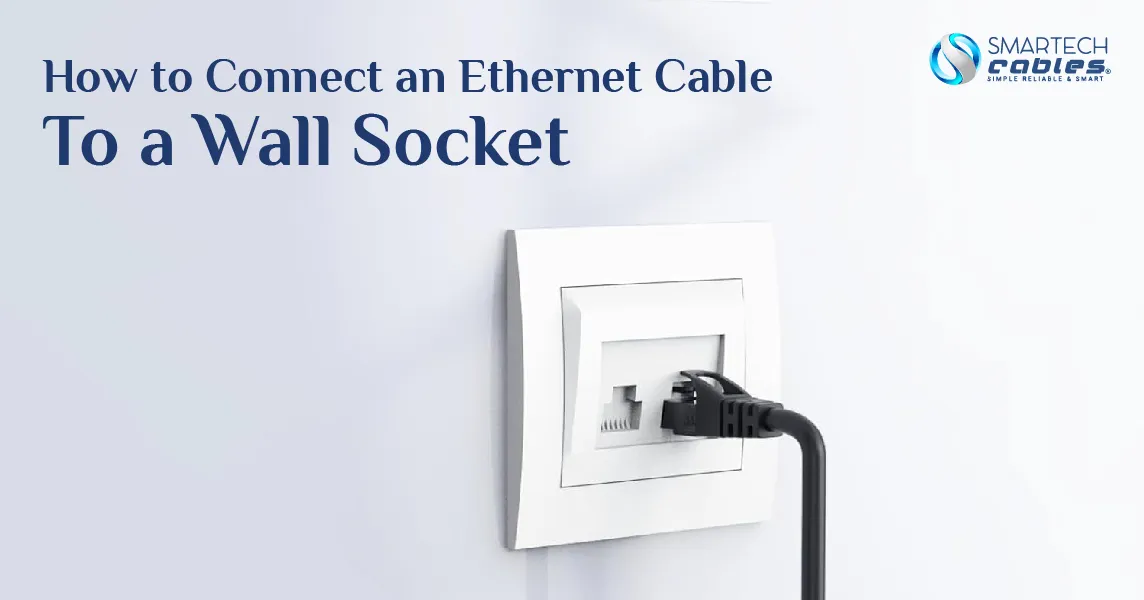
How to connect an Ethernet cable?
To connect an Ethernet cable, simply plug one end into the Ethernet port on your device (such as a computer, gaming console, or smart TV) and the other end into an available Ethernet port on your router, modem, network switch, or a wall socket. The cable will click into place when properly inserted.
How to make an RJ45 cable step by step?
Making an RJ45 cable involves cutting the cable to length, stripping the outer jacket, untwisting and arranging the wires according to either the T568A or T568B standard, trimming them evenly, and then inserting them carefully into an RJ45 connector. Finally, you use a crimping tool to secure the connector to the cable, ensuring all wires make proper contact.
Learn more about how to terminate an Ethernet cable using an RJ45 connector.
How to test an Ethernet cable?
The most common way to test an Ethernet cable is using a dedicated cable tester, which checks for continuity, opens, shorts, and misfires. Alternatively, you can test it by connecting two devices that are known to be working to see if a stable network connection is established and data can be transmitted.
Is Ethernet faster than WiFi?
Generally, yes, Ethernet is faster and more reliable than Wi-Fi. Ethernet connections offer lower latency, higher bandwidth, and more consistent speeds because they are a direct physical connection, avoiding interference and signal degradation common with wireless networks.